Thursday, September 8, 2011

Hi, thought I would show off some recent work and tell you about each piece, what inspired me, where it is, and plans for it. First there is "Ah Gosh".

The name comes from all of the blush colors. The original inspiration was the Unicorn glass square focal bead. You need to know that I love Unicorn glass. The colors are magical and they have a way of sneaking into my work regularly. Then I had been thinking about working a Czech dagger beaded bead around that focal and worked at it until it worked. I then worked with color an shape. There needed to be a repeat of the square so I worked two right angle weave beaded beads to satisfy that shape. As I was digging around in the bead stash I found the blush/mauve/rose figure daggers and they were a must and add a great punch and balance to the central daggers. And finally I wire wrapped Chinese crystals around the back to create movement and sparkle. It was a grand adventure to make this necklace.

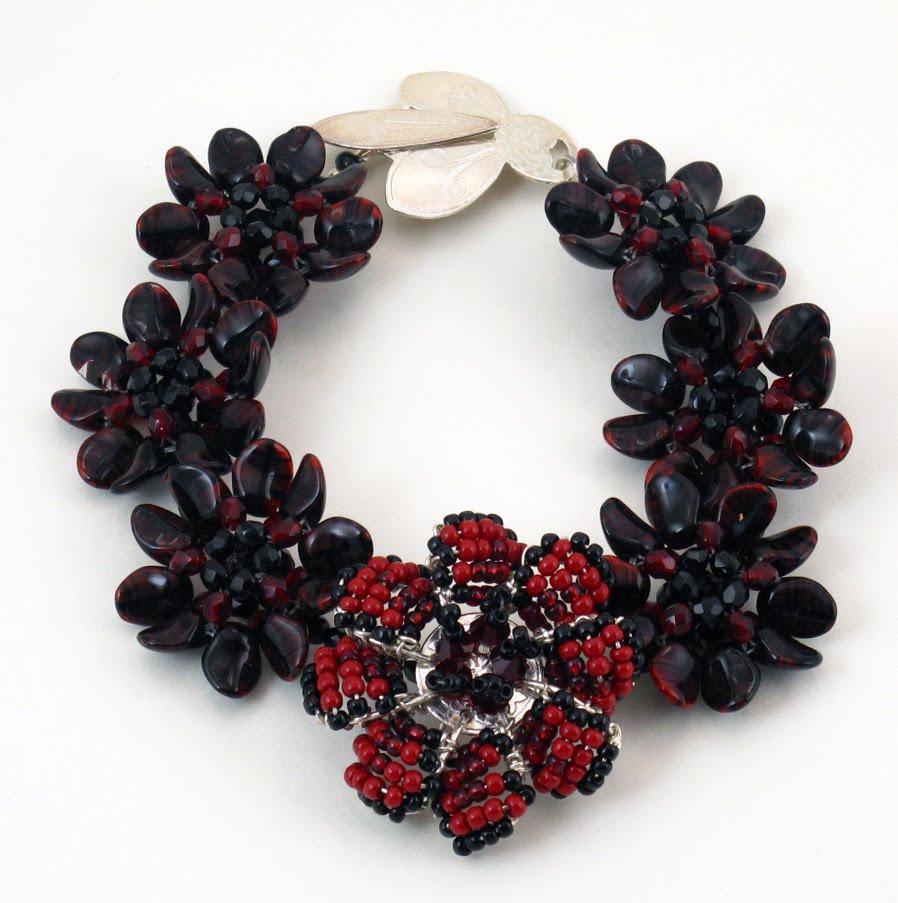
"Teals the Deal", is all about teal. As far as I'm concerned teal is the best color ever. When I found the petal shaped teal beads something had to happen with them. The focal is a sterling silver disc that I drilled holes in and then created a wire frame of petals. Once the wire petals were established I wire wrapped seed beads to the wire frame, creating color and shape. I finished the bracelet off with a hand fabricated toggle that was first roll pressed with a petal image, cut and shaped. I guess I have a very floral statement going here and, of coarse, there is teal. It is now at the Main Street Gallery in Edwardsville, IL. Stop by and say hello.

This is "Mad Lilly". She started out from the yellow dagger beads. This necklace turned out to speak SUMMER in big capital letters. There is a slight hint of hot pink around the edges of the spots on the yellow dagger beads, like oil on water would look. Because of the hint of pink, it became the third color in this color triad. This necklace is all about fun, sun shine, and girlie, girl wearing. I'm sorry it will be put away now for the winter, but you might find me wearing it on a gray winter day just for the heck of it. As it turns out I won't be wearing this necklace ever again. It got sold to a lovely lady at Bead Art. I feel so good that it is going to a good home where it will be worn frequently and loved. Thank you.

All three pieces have been used to apply for shows, proposed for inclusion in a book, and will be displayed in my booth for shows this fall. As you can see, I've been have tooooo much fun with design this summer.

Wednesday, June 22, 2011

Bead & Button Show 2011

It's always extraordinary, The Bead & Button Show, but this year seemed to be the best. I have finally found my place at this show and that is to teach. I taught six classes during the week long event and had absolutely fabulous students. Preparation for all of these classes was all consuming for about three months. Of coarse, there are always other things going on, but there is a lot to be truly prepared for those students to walk into class. I respect so much, that all of my students pay a hefty fee to take a class at this event and I want their experience to be the best I could make it in my classes. The staff does a wonderful job of creating the best experience for all of us; students, instructors, and vendors. It is a well put on show in my opinion.

I have the best assistant, Annie Pennington, who arrived at six o'clock sharp on Monday morning June 6th. We had made every effort to preparation for all of the classes before our departure. I wanted to cover every possibility when it came to tools for my students to use, so the boxes were heavy with those possibilities.  I felt it would be a challenge to get anything printed while away from my beloved printer. You know, go to an office supply with a CD to get one of your files printed, not fun. So I had printed and filed everything I could possibly think of. And we had to be ready for Meet The Teachers on Wednesday with the boxes of kits ready for that crazy bead infused evening. We looked a little like the Clampetts, when we hit the road.

Grand entry to the show on the third floor of the convention center.
Our drive was uneventful. Lots of green, beautiful fields and in seven hours we were at the Frontier Airlines Center in Milwaukee. Registration wasn't open so we went to our hotel to checked in and relaxed a couple of hours. We then went back to the show sight to register and get everything moved in so we would be ready to setup our classroom the next morning. We had a nice dinner at the Cheese Cake Factory and got to bed early. We knew we had a long, long day on Tuesday with a seven hour workshop all day and a three hour class in the evening.

Riveted Etched Bracelet Class
Learning to saw metal.


Laura Kuhlman proudly shows off bracelet.


The next morning we were at the show sight at 7:30 and setting up class to teach metal etching, sawing, hole punching, and riveting. Our tables were all covered with plastic, we got the tools organized for the various steps we were guiding our students through, and we set up a petite Kathryn Bowman Studio shop on one table with kits, patterns, toggles, etched pendants, and pendant suspensions. Everyone arrived excited to learn how to etch metal with Ferric Chloride. Annie and I had done a lot of the mundane elements involved in getting the metal etched. There was a lot to do during this class and we had to keep things moving along. It has always impressed me, at the Bead & Button Show, how motivated the students are. They are knowledgeable and are there to learn.

Etch for Design Class
 

Two hours after the riveting class was finished, we were cleaned up and ready for the Etch for Design Class. This is a three hour class that quickly acquaints the student with the steps involved with etching metal. The students also learn to sew, file, and use a disc cutter. It's a fast paced class and we cover a lot of material. I was so grateful to have Annie there to help out. By the end of class and clean up we had enjoyed a fifteen hour day. Our legs and feet were throbbing and all we could do is crawl off to bed. Thank goodness we only had one activity the next day and it was in the evening.


Crowd at Meet The Teachers.
We got some much need rest on Wednesday. We weren't good for much more than lieing around after our long day before. We headed over to the show site at four and set up for Meet The Teachers. We set up early, so we could go have a bite to eat and be well fortified for the ensuing craziness we would be involved in all evening. The doors opened at eight o'clock with a sea of humanity covering the banquet hall in quick time. This event is sponsored by Swarovski Crystal Elements and is intended to introduce the teachers to their students, people who want to be their students but couldn't schedule that class, and possibly fill the remaining seats in classes not yet filled. Lots of kits get sold and everyone gets to mingle and talk about beads with like minded folk. We are all bead nerds and proud of it.
Milwaukee Art Museum

Thursday was a day off for us. We slept in and headed off to the Milwaukee Art Museum around noon. Milwaukee's Art Museum is an awesome architectural statement. It sits right on the edge of Lake Michigan and looks much like a sail boat. The museum has an impressive permanent collection and attracts the larger national traveling art exhibits. After a couple of hours at the museum we went for one of the best Rubin Sandwich's I've ever found, at John Hawk's Pub. Annie agreed that it was pretty darn good. After dining we headed over to the bead show site, for the actual show was opening Thursday evening at four. It was time to find out what the hundreds of vendors have to offer this year. What's new? What are the trends? Thursday evening was a few hours of dedicated bead, tool, and jewelry component shopping.
Lampwork in Competition
Beaded Object in Competition


We would also be seeing the full showing of "Bead Dreams", a competition for the best of the best beadwork. This attracts entries from around the world and is sponsored by ten industry sponsors that offer great gift certificate prizes.

Etch The Image Class
Flower Petal Necklace Class


So much for goofing around, Friday was another long day with two classes, Etch the Image all day long and Flower Petal Plum Blossom Necklace. The etching class went smoothly with four students enrolled. The cuff that they create during that day is a big project, but three of the four walked out of class wearing their cuff. WooHoo. The pace was going to be stepped up with a full class, 15 students, that evening. I knew the hardest part of the evening was going to be our location. The classroom that we were in was on the convention show floor that has ceilings approximately three stories high. Because of this height, your voice seems to evaporate. By the end of the three hour class, I felt like a raving maniac, with my efforts to be heard. Somehow, with Annie's help, we guided the ladies through making a few beaded beads, toward their effort to make the Flower Petal Necklace.  After straightening up when the class was finished, we know we were on the home stretch with only two more classes. We would be in a different classroom the next day, but we were too tired to move Friday evening.

Morphing Plum Blossom Bracelet Class
Saturday morning, once again we were at the show site bright and early, to move what we needed for the day to our assigned classroom. We didn't have a lot of time, but we should be alright, except the elevator decided to go into spasm. Annie and I ended up moving our roller cart on the escalator, running back up the escalator and moving the remaining roller suitcase and cart down. We scurried around and got the room set up and were ready for class on time. I mentioned earlier that the students at Bead & Button are knowledgeable and this was very true of the group on Saturday. I was teach a technique that was new to all of these experienced beaders and they pushed me to make this technique fit into their current knowledge. After a day of effort and a little bit of frustration, the ladies left class with a new skill. Everyone was happy and Annie and I got rave reviews. Rock on Plum Blossom Beaded Beads.


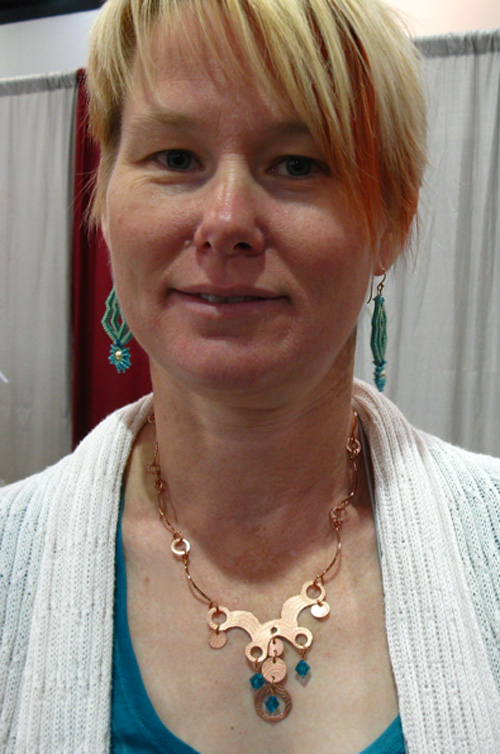
Kathy King models necklace.

A little sad, one final day of teaching at the show. Sunday morning we were teaching Etch for Design one more time. We had discussed and rearranged this class with great results. With as little explanation as possible, we got everyone etching their metal. While the etchant did it's magic, the explanations began. The class earlier in the week became rushed, much to my dissatisfaction. Changes had to be made and we made them with great results. It's a short class that covers a lot. Despite horrible lighting, I have to show off one of the successes from Sunday morning on the left. The students went on their way, we packed everything up, moved all of our equipment to the car, and piled it in. There was a little more time to make those last minute bead purchases, so back to the show site.

Carts at IKEA.
Monday morning arrived and time to head for St. Louis. We decided to make a small side trip to IKEA in Chicago on the way home. A left, another left, a sling, a toll, another toll, and another toll and we were at IKEA. Some great shopping therapy and we were once again on our way to St. Louis. About five we pulled up at my house exactly at the same time Annie's boyfriend, Brandon did. They helped me unload and the trip was over.

In a way it has been a let down since getting home. There was a great deal of preparation, the show is all about putting forth extreme effort, and sitting quietly at home makes you wonder if it really happened. Writing this blog has been therapeutic by reminding me of all that did happen that action packed week in Milwaukee. It all puts a smile on my face. Now it is time to get ready for 2012. Can't wait!


Sunday, May 15, 2011

Jewelry Roll Up

Roll Up Jewelry Storage You Can Easily Make.
When I started making jewelry, I wondered how best to carry my jewelry to shows, boutiques, galleries and when traveling by air. I shopped around. I looked around. I asked other jewelry makers. I tried many suggestions and dreamed up a couple of solutions of my own. Today, I thought I would share the most recent form this quarry has taken. I hope you will benefit from what I have found to be a very easy and workable solution, an easy to make jewelry roll up.

Free Roll Up Pattern
E-mail me @ 1kathrynbowman@gmail.com

You don't have to be an expert seamstress at all. In fact, all you need is a sewing machine or access to a sewing machine, little sewing experience, the fabric necessary, and a pair of scissors. What you will need:
  • Sewing Machine
  • Sewing Scissors
  • Pinking Sheers
  • Sewing Pins
  • Felt - 12 X 57 inches
  • ½ inch Grosgrain Ribbon - 15 inches
  • Loop Side Velcro - 6 inches
  • Color Coordinated Thread
1. Buy the fabric and thread. I've used felt and choose a dark color so the Roll Up wouldn't look soiled too quickly. In the previous version of the roll up I used felt and had stitched both the hook and loop side of velcro into place. After using the previous version for a while, I found that I only need the hook side of velcro. The hook side of velcro is the rough side and has tiny hooks. The hook side of the velcro will attach itself directly to felt fabric when rolled up. This eliminates a step for you.
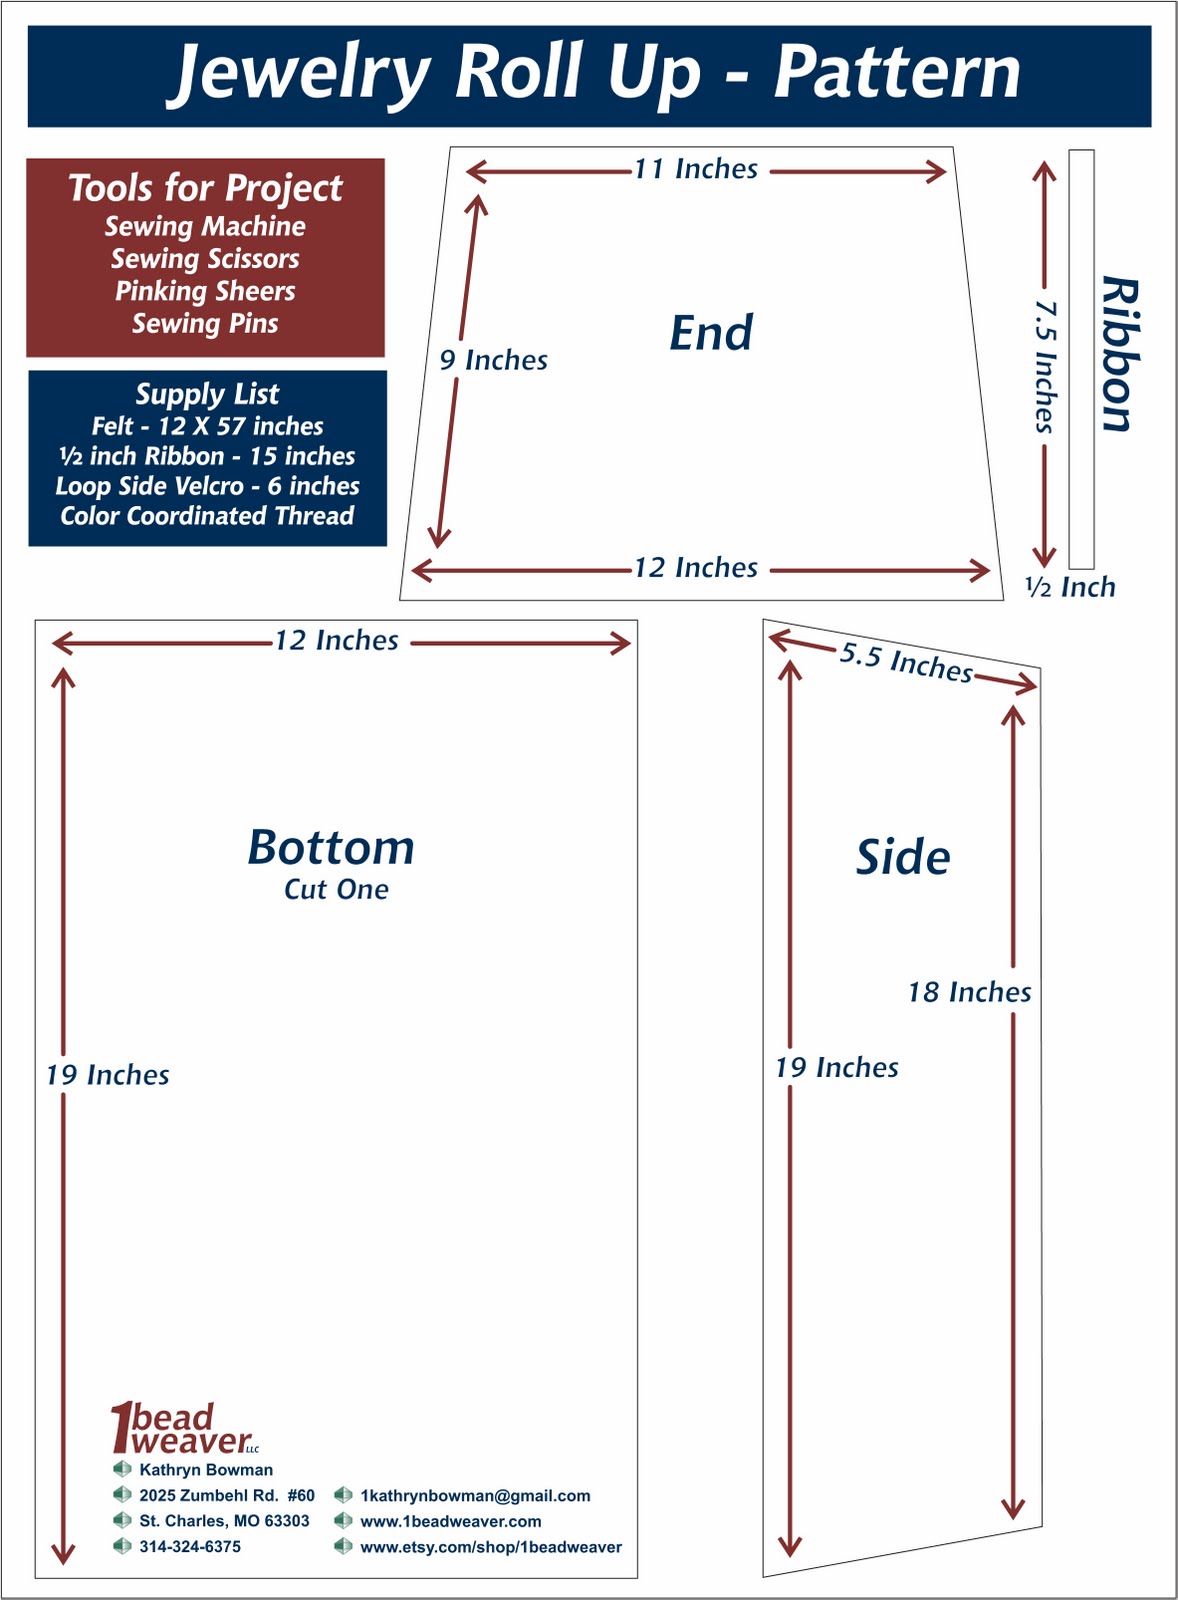
2. Cut out the pieces. The last time I made Roll Ups, I went into production and cut out four. If you want a hard copy of the pattern, I have a free pattern in PDF form available for you by e-mailing me at 1kathrynbowman@gmail.com. Basically the bottom is 12 X 19 inches, long sides are 5.5 X 10 inches, and the short ends are 12 X 9 inches. On all of the side pieces cut one side a half inch narrower so that they will tuck in nicely when you roll everything up. You will need one bottom, two long sides, and two end sides.
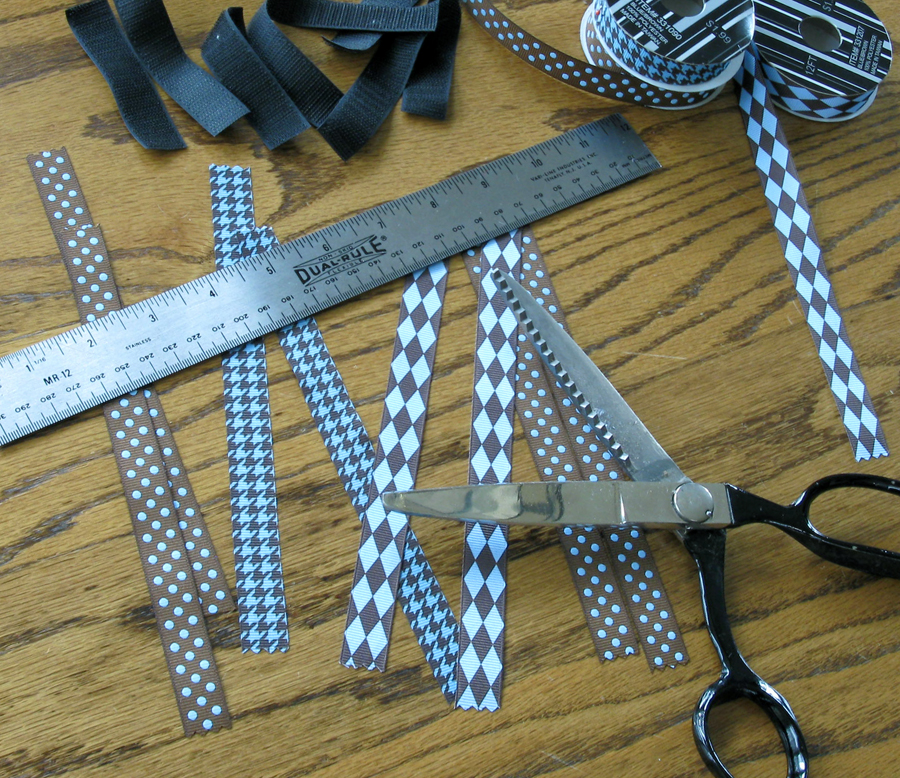
3. Cut Two 1/2 inch ribbon lengths of  7.5 inches with Pinking Shears. By cutting with Pinking Shears you will not need to finish the ends. I have found grosgrain ribbon will stand up to the wear the best. I hope for my current set of Roll Ups to last a while, so the length of wear is important. Grosgrain ribbon is the ribbed ribbon, with regular ribs going across side to side.
4. Cut Two 3 inch lengths of looped velcro.
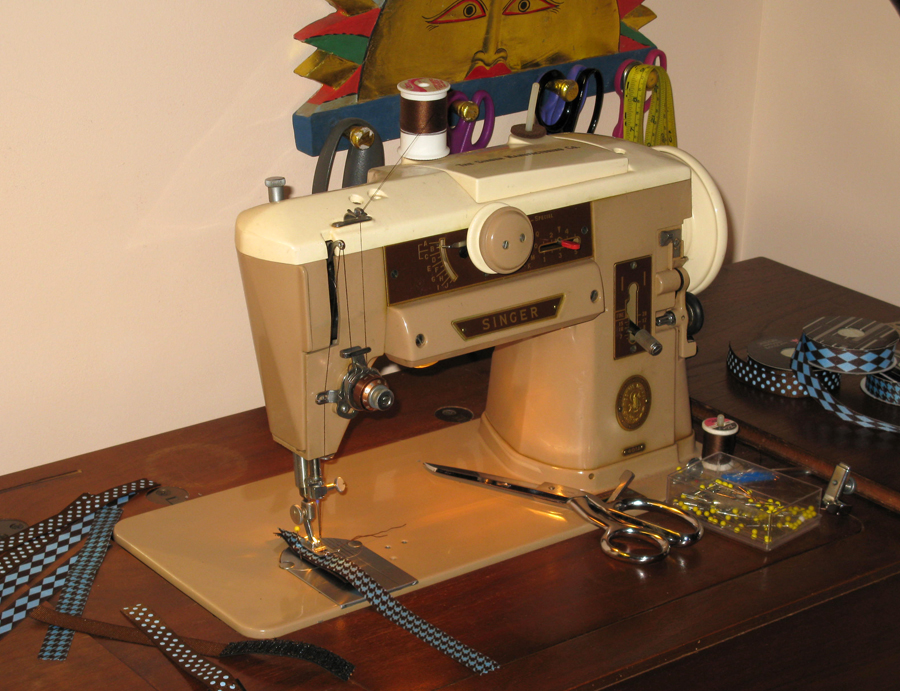
5. Zigzag the the velro to one the end of the two Grosgrain Ribbons, by stitching around all four sides of the velcro and then one diagonal pass between two opposite corners. Pin the velcro to the ribbon in
two or three places so they will not slip as you are sewing. Here you get to see my vintage sewing machine. I love this machine, I hope it never dies.
6. Start on one end of the bottom. Divide the end length into thirds and position the ribbon with the velcro ends in the two one third spots. Pin the ribbons to the felt end with the ribbon ends heading away from the bottom with the velcro side up. Over the top of where the ribbons are pinned, pin one of the short end sides to the bottom end and evenly match up the sides. Using a zigzag stitch, stitch right next to the edge all of the way across that end.
7. Stitch the other end to the bottom. Pin first and zigzag all of the way across.
8. Prepare to pin the long sides on by tucking the side of the end pieces away from the long side. This will keep you from inadvertently sewing the side of the end into the long side stitching. Pin the long side flap to the bottom and zigzag all of the way across. Repeat step #8 to attach the other long side.
     It's finish just that quickly. Now you can lay your precious creations in their carrier, fold first the short ends and then the long ends, and roll the end up heading toward where the velcro ribbons are attached. Once rolled up, bring the ribbons smoothly around and attach the velcro to the felt where they meet. These roll ups easily tuck into a carry bag, luggage, or into a safe at your hotel. I have found them to be convenient, my jewelry stays untarnish, and everything stays orderly. The Roll Ups make it easy to keep the jewelry organized by necklaces and bracelets.
     I hope you find these Roll Ups to be as useful as I have.

Thursday, February 24, 2011

Thinking About Warmer Weather

Flowers everywhere, I can't wait. I've always had a thing about flowers and they sneak into my work regularly. This piece was made during the snowiest time this winter in the St. Louis area. Does it have you thinking about spring? Being creative and infusing your thoughts and feelings into your work is so therapeutic.

Hand wire wrapped in Sterling Silver, the Rhodonite and
Chinese Crystal Beads create an asymmetrical
balance to a blast of pink flowers on the side.


Three Beaded Bead Flowers
created from Czech glass beads.


Sunday, December 19, 2010

Bead Jewelry Making Class Schedule

Jewelry Making Class Schedule


It's that time again. What will I teach for the next few months, do I have a sample for students to look at, do I have instructions written or ones I can easily adapt and when will I teach the classes. I doubt my potential students even give it a thought that there is much that goes into setting up a teaching schedule. And really why should they? This happens three times a year in my life for the bead store I teach for and once a year for the Bead and Button Show.

I teach at a bead store in St. Louis, Lady Bug Beads, and at the Bead and Button Show, every June in Milwaukee, and they set a deadline when they want all of my information, photos of samples to put on their web site, and the samples for jurying or in the store for display. I'm so glad to have a deadline. I do work on all of this in advance, but that deadline does give me the necessary push to actually get the samples made and figure out the schedule. I normally have classes scheduled to teach in my home as well. Right now I am in the middle of rearranging my studio and office arrangement, so that I have a little more room for my studio, better natural light for the studio and more efficient work space, so I am not going to schedule any classes in my home studio until March.

Each time I go through figuring out the schedule, I drag out my file with the lists from previous class posts over the past few years. I look through the file, thinking things like; is there a class I can resurrect, what has been popular, do I have anything new in the works? I make a big effort to add new classes each time. This keeps things fresh, while challenging me to figure out new work that my students will be interested in. In the end I come up with a list of seven or eight classes that I can rotate through the next four months or that I think the editors at Bead and Button think will sell for their amazing show each June.

Now the calendar gets pulled out. What holidays do I need to avoid? For example it doesn't work to schedule a class on Mother's Day. When do I have shows scheduled? Do I have meetings or family or friend events schedule? Does the bead store have any events on their schedule that I should avoid those days? A big red "X" goes through all of the days to avoid. With what is left over I start setting the schedule. For some reason, I really struggle with this. I wish I could figure out an efficient way to do this. I've got my calendar, I've tried spreadsheets, and it all still gives me a headache. Oh well, there is only about a day of angst.

All the while I am making the sample for each class or finding the sample I've used before. I need a great product shot of that sample, for the bead store, my web site, and Bead and Buttons catalog. And I need to write a compelling description to sell the class and a supply list for the students to go by before coming to class. That supply list can, quit often, be a bit of a challenge. Over the years I have accumulated a vast bead supply. When I make a design that entire world of beads will come into play. To make the supply list I need to name what each bead is, how many are needed and what tools will be necessary to preform the skills involved.


Finally, it does all come together. The whole process consumes me for about three or four days and that isn't making the samples. Depending on how many new classes I am planning, making samples will be going on for weeks. I'm always excited to deliver my new samples to the bead store or deliver my box of samples to the UPS Store for shipping to Bead and Button in Milwaukee. It is also a big sigh of relief when I type the last class description into my web site. I don't think about the whole process for a week or two, but then I'll have an idea for a new class and the process has started all over again.

It's all well worth it. Between Thanksgiving and through the middle of January I don't schedule any classes. No one signs up for classes, because they are so busy with family and friends. That first class I teach in January, I always find myself getting really excited. It's good to be back teaching how to make jewelry. I've always said there is a drug in beads and the zen of working with metal can't be described, so there are always students interested in the many techniques involved in the process of creating human adornment. For this I am grateful.

My schedule is now posted on my web site, 1 Bead Weaver. Lady Bug Beads is now in finalizing their list of classes that go through May. Lady Bug has six permanent teaches and various visiting instructors, either local or from out of town. Sign up for classes at the Bead and Button Show started on January 11 and my classes are already half full. I'm lovn' that. So see you in class!!!!!