How do you make jewelry when you are on the road? If you are like me, I can't stop making. There can be many reasons. I may be making a sample for a new class, there might be a art show in my not too distant future, I might be experimenting with a new design, and the reasons can go on and on. But right now in my life, I need to be making jewelry for the simple reason of sustaining my jewelry making business. Because of this when I take a trip for business or pleasure I have devised ways to
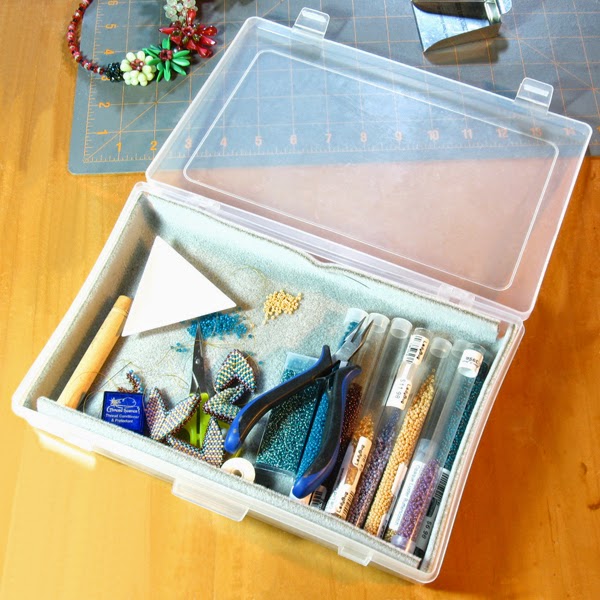
 So you are going to benefit from my efforts to figure out what works and what doesn't. As a metalsmith, it is pretty obvious that it is impossible to work on the road, unless you are visiting another metalsmith that you have a pretty good relationship with, and that will allow you to work in their studio. Put simply a metalsmith needs tools and a work space. So I get all of my metal components for my projects finished before I head out. On the road I work on my beadwork or wirework. Everything packs up small and is really portable. This requires packing tools, supplies, and a work space.
Tools for beading are pretty simple, scissors and a few needles, done. Wirework is tool intensive, and for that I take three pliers, wire cutters, a file, tweezers, a crimp pliers, and a crochet hook if I bring a crochet project.
 I have found a travel pouch that is the length of the longest tool and has a zipper all round on the top with easy access. In the lid is an inside zippered pouch that I can tuck a finger file, the file handle, and the crochet hook. Take you time in find the ideal pouch. It's out there. This one that I am using was described as a shaving kit.
If you are worried about carrying tools on an airplane, here is the link to the TSA (Transportation Secruity Administration) Traveler Information page. You can carry pliers, scissors less than four inches long, and a finger file. Now if I were to leave the finger file in the handle I have for it, I could not carry it, because sharp objects can be no longer than seven inches. With the existing rules today, I'm good if I take the file and handle apart. In talking with my students over the years since 9/11, there is an amazing amount of confusion about what an airline passenger can carry on the plane. If you are in doubt, it is very easy to find out before you head to the airport and feel secure about what you are carrying with you. If you are really in doubt, put that item in your checked bag and it will be waiting for you at your destination. For heavens sake, you can put a hatchet in your checked baggage. If you are totally paranoid, ship the questionable item UPS to your destination. It has been thirteen years since 9/11 and we need to update our thinking about travel and what we can carry. Things have changed a lot since that tragic day. Stay current with a quick visit to the TSA site. Oh and, scroll down on the page, it is a long page. That way you will get all of the information you need.
Part of getting my outfits all together for my trip, is also put together my jewelry making projects. "Travel Kits" we will call them. I have learned over time that I really only need enough Travel Kits to keep me busy for the actual travel time, the flight time and the sit around time, and maybe one more if there happens to be a delay. (Yes, they do happen.) When I reach my destination you will be too busy visiting, eating, touring, or working, if you must, to be sitting around making jewelry. All of the Travel Kits go into another pouch along with any findings I anticipate I will need for the projects. I see ladies pack boxes and boxes of beads for a trip, because they can't decide what they want to work on. I say keep it simple, lighten the load, and take the time to create Travel Kits. Added bonus, when you get home you have all of the projects organized to keep working with no fuss.

I'm aware there are many products available for travel and the jewelry maker. I'm not trying to be in
competition with any of that. These are my low tech. solutions for keeping it simple. I hope you have picked up a tip or two. The travel box and pouches fit easily in my carry on when traveling by air. If I'm taking a